Buildings are created in layers (just like onions, trolls and parfait – whatever the hell that is).
The first layer you make is the frame that holds the rest of the building up. I went for ‘Standard construction’ which means that the structure is effectively a big ‘ole pile of concrete bricks.
Walls
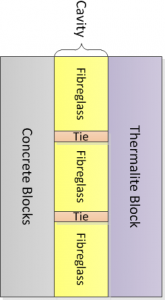
The structural walls for the build are ‘standard construction’ which, in the UK at least, means an inner layer of Thermalite block an air gap aka: ‘cavity’ which contains fibreglass ‘bats’ and an outer layer of Concrete blocks.
To summarise, the walls at this point of progress have this make-up:
I’m not sure if Thermalite is the used lingo outside of the UK. The font of all hearsay refers to them as Autoclaved Aerated Concrete – Snappy. They are effectively light weight bricks with a low thermal conductivity.
Fibreglass bats are basically flimsy sheets of fibreglass quilt that have a constant width (typically ~ 70mm to suit the cavity size) and squared edges to allow the builder to tessellate them when inserting between the two block layers. The other height and length dimensions of the bats are chosen to allow wall ties (stiff metal wires that sit in the mortar at each end and connect the 2 block layers) to be placed at regular intervals. The wall ties tie the Thermalite blocks with the Concrete blocks to keep them the cavity distance constant.
Concrete blocks are as simple as they sound (and bastard heavy).
The principle advantages of this form of construction are:
- Obvious structural integrity.
- Thermal Insulation – both the thermalite block and the fibreglass are good insulators.
- Copes well with rain and damp, the cavity allows any wet to run down the inside of the concrete block without getting to the Thermalite block. The presence of the fibreglass batts doesn’t interfere with this too much.
This form of construction has fairly little acoustic benefit beyond being a large mass.
You can get Acoustic wall ties. Adding these would reduce the transmission of noise through the studio walls. They would not have any effect on the acoustic treatment of the internal studio space. I didn’t use these ties, so I can’t comment on the cost or ease of installation.
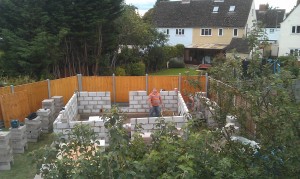
Action shots
In the first photo we’ve only started work on the outer skin of Concrete Blocks.
Roof
The Roof, as mentioned before is a fibreglass, flat roof construction. There are at least 2 ways of making a flat roof: Closed and Open.
Closed roof design places the insulation above the rafters, but under the final roof deck. The roof insulation is therefore closed off to the room and the humidity that will come from the room will be stopped below the insulation (where it wont condense because it is still warm).
Open roof design places the insulation between the rafters. This typically means that the insulation is open to humidity coming up from the room. It also means that the humidity will come into contact with the cold final surface of the roof. This needs to be mitigated by ventilation to stop it dripping back onto the top of the ceiling.
Open flat roof designs are definitely inferior from a thermal insulation perspective as the rafters bridge the insulation. Their only saving grace is that they are not as tall.
Due to the permitted development laws that I’m using instead of having to apply for planning permission I am constrained on the total height for the build. This is a bit of a pain as a bigger volume of the studio would help with the quality of the sound within. In order to retain as much usable space as possible, I have opted for the basic open roof design. To be frank, a closed roof design would have meant that my studio was only suitable for children and little folk as I can easily jump and hit my head on the plaster now.
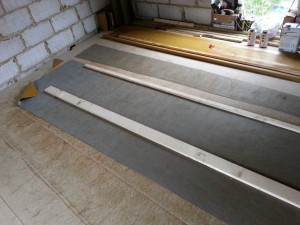
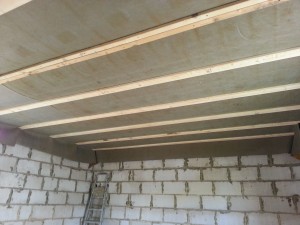
I have however tried to mitigate the acoustic and structural shortcomings of this design. In order to do this I have placed a membrane of high density acoustic membrane BELOW the rafters. As well as stopping the transmission of sound this is a vapour membrane which means that the moisture no longer contacts the cold inside top surface of the roof.
To summarise, the roof structure looks like this (click to embiggen)
The scale there is way out – The I Beams are 100 mm wide and have a gap of 500 mm between them (i.e. 600 mm centres) but it shows how all the bits fit together.
Another thing that is not shown is that between the I beams and the ply roof deck are items called ‘Tapers’ these are wood and run along the length of the I Beams in such a way to ensure the deck slants so water runs off.
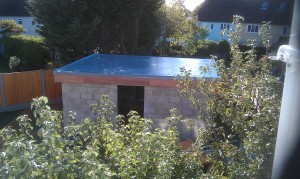
The view from the outside:
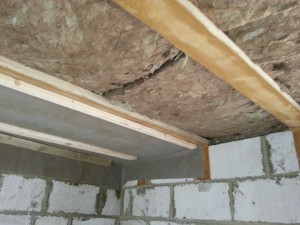
The following photos show how the Acoustic membrane was added to cover the dense fibreglass:
